Private: How to Repair and Replace Myrlen 150 Diaphragms
Comments Off on Private: How to Repair and Replace Myrlen 150 DiaphragmsHow to Install the AirSweep: Outside-In Mounting Bracket
Comments Off on How to Install the AirSweep: Outside-In Mounting BracketOutside-Inside mounting kit includes all parts to easily install the Airsweep material flow system in any vessel without welding.
Unlike many other flow aids, AirSweep® material activation system is installed outside the vessel for easy installation, cleaning and maintenance. AirSweep Outside-Inside (O-I) mounting brackets allow for easy, no-weld mounting of the AirSweep material flow system nozzles from the exterior of the process vessel or equipment.
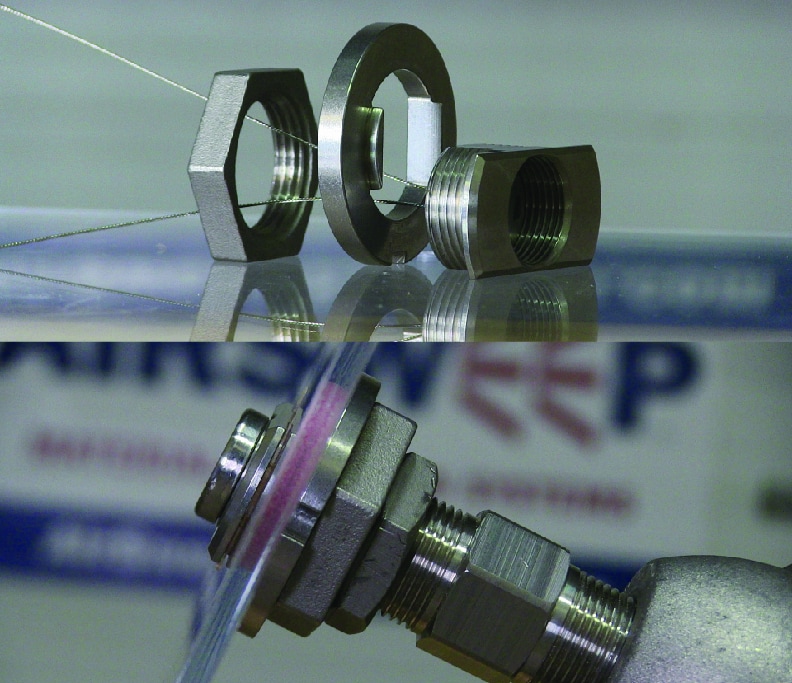
Installation is fast, easy and inexpensive. The innovative outside-in mounting bracket does not need any welding—all you need is a 1-3/8″ diameter hole and a spanner wrench. Just follow this simple AirSweep installation video tutorial.
Using the supplied mounting kit, O-I brackets install by inserting through the outside wall of the equipment and bolting into place. Holes from previously installed equipment may be used, often with little or no modification. Once the bracket is in place, the Airsweep nozzles can be simply threaded into place, to provide on-demand flow of the toughest materials. The O-I mounting brackets are available in three sizes, to accommodate the models VA-06, VA-12 and VA-51 Airsweeps.
With the AirSweep Outside-In Mounting Bracket, you can retrofit or replace existing aeration devices with minimal cost or delays. You can also find more detailed installation and maintenance guides for your AirSweep model in our Resources section.
DAZIC Zero Speed Switch: Prevent Material Pileup
Comments Off on DAZIC Zero Speed Switch: Prevent Material PileupIndustrial processes and systems use many interconnected moving parts. If any of those parts failed unexpectedly, it can create a cascading effect that can damage products, equipment and infrastructure and create safety hazards. DAZIC zero speed switches can help prevent costly and dangerous material pileups.
What is DAZIC®?
DAZIC® stands for Direction and Zero Indicating Contactors. It can be integrated into your system and alert you when the device rotation deviates from its standard operating parameters.
DAZIC can be installed on any device with a rotating shaft. This includes:
- Rotary valves
- Bucket elevators
- Belt and screw conveyors
- Saw blades
- Drive motors
What are the different DAZIC models?
Choose from our three lines of electromechanical, inductive, and electronic zero speed switches. The video discusses the different products and their features, to help you decide which model is best suited for your needs.
Electromechanical series
- No electrical input needed
- Base or flounge mount
- Can be connected to shaft, pulley, wheel, chain sprocket and more
- Wide range of models for all applications
- Durable housing options include aluminum, cast iron, and explosion-proof
Electronic Rotoguard IV Series
This DAZIC line transforms the rotation of the input shaft to voltage pulses, which are then digital processed to detect changes in motion or application up to 400 RPM. It is designed to withstand tough environments.
- Solid state electronics
- Base or flange mount
- Universal voltage input
- Programmable start up and alarm delay
- Simple push button calibration
- NEMA 4 or explosion-proof housings
Prox Micro Inductive Proximity Switch
The DAZIC non-contact micro-sensing device precisely monitors the RPM rate of many rotating ferrous target.
- Large sensing range
- Easy to program and field adjustible
- Status and relay indicating LEDs
- Non-contact sensing, does not connect to shaft
- Reads any ferrous target
- Powder-coated NEMA 4 aluminum housing for long life and tough industrial applications
Trusted by the world’s biggest brands
All DAZIC products are manually assembled and tested to ensure their quality and reliability. It is trusted by DuPOnt, Covanta, Starbucks, Cooper Tires, Jack Daniel’s, AK Steel, GoodYear, the city of Spokane, and more. Watch the video for more information about zero speed switches.
No Tools Needed: AirSweep Tri-Clover Clamp
Comments Off on No Tools Needed: AirSweep Tri-Clover ClampThe AirSweep® nozzle with Tri-Clover clamp mounting system is designed for quick installation and removal without any tools. It is ideal for applications that need easy installation and removal. This includes situations like:
- Portable vessels
- Frequent change-outs
- Frequent cleaning or sanitizing
The video discusses the parts of the Tri-clover clamp mounting system, and how to install and dismount it.
AirSweep Installation Tutorial: Attaching the MF-51 Mounting Flange
Comments Off on AirSweep Installation Tutorial: Attaching the MF-51 Mounting FlangeThe VA-51 AirSweep can help provide on-demand material flow in large bins, silos, hoppers, chutes, mixers, and other vessels and equipment. It is installed outside the vessel wall, for easy cleaning and maintenance.
This video demonstrates how to attach the part no. MF-51 mounting flange to the vessel wall.
Basic Steps
1. Position flange on the wall surface. Mark the hole for AirSweep and the bolt circle layout.
2. Drill or cut the hole.
3. Fasten flange to wall by bolting.
4. Apply the anti-seize compound to the front-threaded section of the AirSweep. Thread the AirSweep into position, so that the front of the AirSweep body is aligned with the inside wall of vessel. This will properly position piston head within the vessel.
5. After the AirSweep is correctly positioned, tighten the lock nut against the flange to keep the AirSweep in position.
Watch the tutorial
Learn more about the tools, step-by-step instructions, and answers to the most common questions about installation.
How Air Pressure and Volume Affects Your AirSweep’s Performance
Comments Off on How Air Pressure and Volume Affects Your AirSweep’s PerformanceYour AirSweep system clears material blocks with powerful bursts of compressed air. For best results, it’s important to maintain proper pressure and volume.
How does an AirSweep system work?
Each AirSweep nozzle directs a high-pressure, high-volume 360° burst of compressed air or inert gas along the inside walls of process equipment or vessels, breaking friction to lift and sweep stalled material back into the flow stream.
The air receiver, air supply line and solenoid valves deliver the compressed air to the nozzle. The Control Concepts engineers will recommend the right set-up and necessary accessories to reach the recommended PSI.
What happens when you don’t supply enough pressure?
This video demonstrates the difference in the AirSweep performance when you change the pressure. If you are experiencing any problems with your AirSweep, check the pressure and volume. If problems persist, do reach out to us—we’ll be happy to help!


